Stars
Stars are the key to victory in Solaris, capture the most stars to win!
Stars are displayed as star shaped icons with a circular halo denoating which player the star belongs to by colour. When zoomed in the star will display garrison and how many carriers are orbiting the star (if any) followed by the star’s name. Above the star there will be 3 numbers, these represent the star’s Economy, Industry and Science infrastructure respectively. Click on the star to view it in detail.

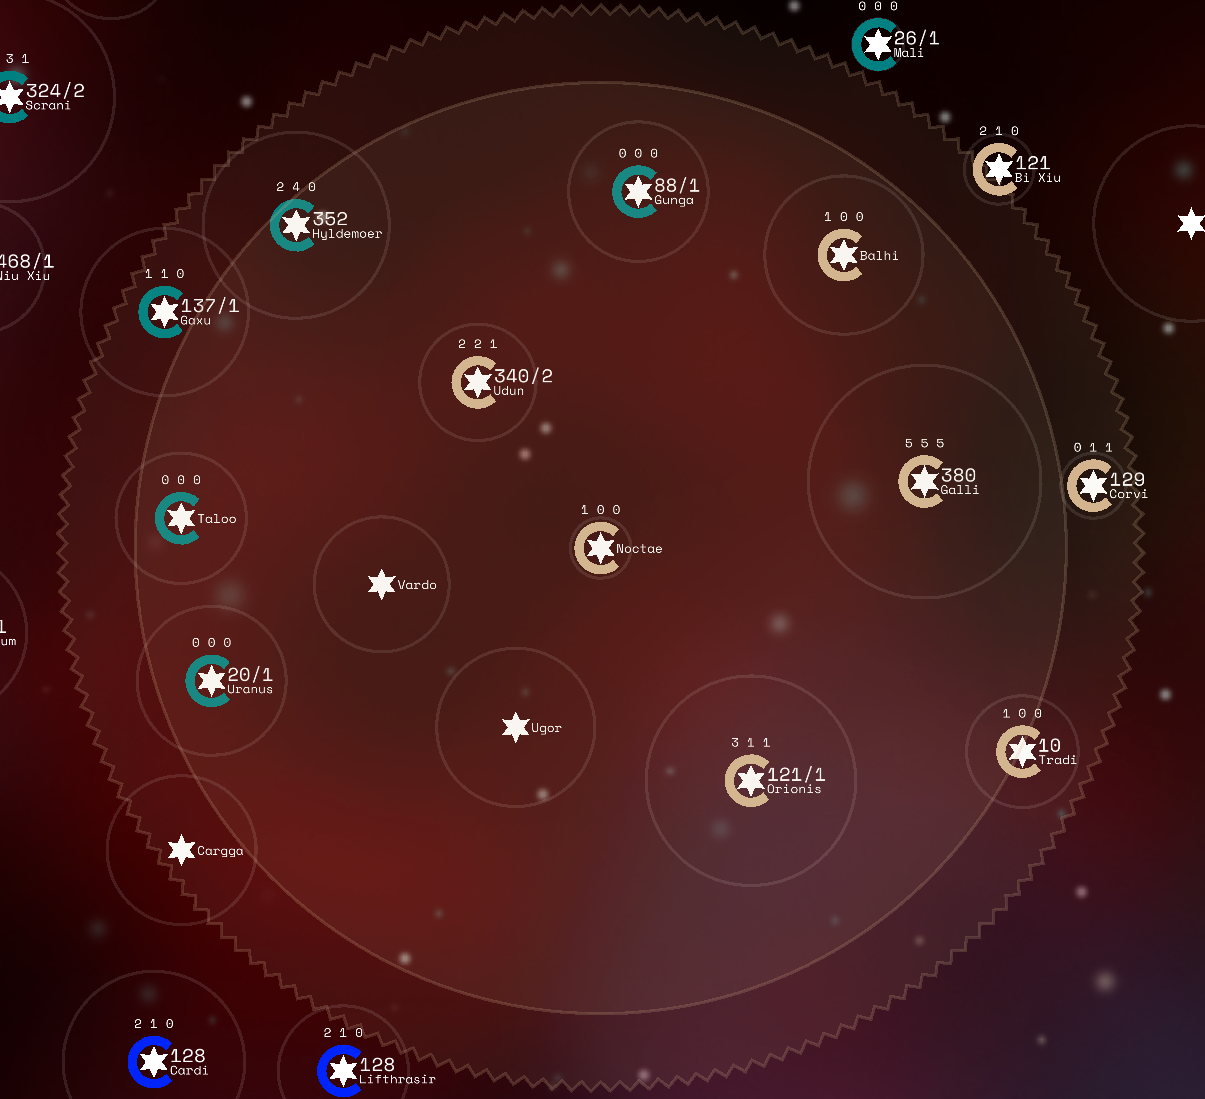
Stars on the map display the following details:
- The star name
- The star owning player denoted by its colour
- The star’s total garrison
- The star’s infrastructure (Economy, Industry, Science)
- Whether the star has a warp gate (additional halo)
- Whether the star has more than 1 player in orbit
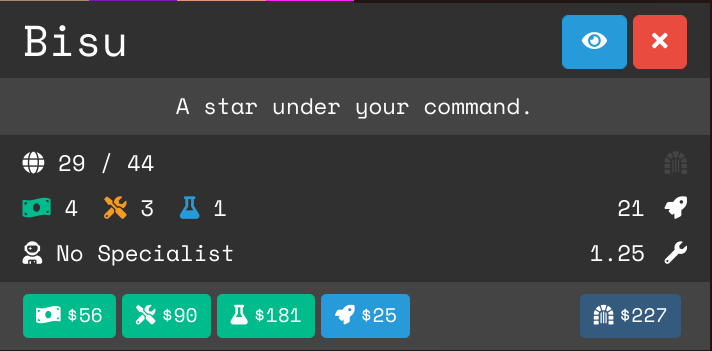
Click on a star to view the star statistics in detail. This screen displays all of the information related to the star. In order displayed in the image, is the star name, a button for centering on the star, a button to close the menu, the owner of the star, the star’s natural/terraformed resources, the star’s economy, industry, and science levels, how many ships are stationed at the star, the specialist that is stationed at the star, and how many ships the star manufactures every tick. Below that are the buttons to purchase more economy, industry, and science, as well as a button for creating a carrier at the star and a button for purchasing a warpgate at the star.
Special Star Types
Some stars are different and grant special buffs and abilities, the possible star types are as follows:
- Normal Stars - These stars have no special buffs or abilities.
- Black Holes - Black Holes have
+3Scanning Range but have reduced natural resources. - Nebulas - Nebulas conceal the infrastructure and ship counts at the star from all other players.
- Asteroid Fields - Asteroid Fields have
+1Defender Bonus in combat. - Binary Stars - Binary Star systems start with additional natural resources.
- Worm Holes - Stars with Worm Holes come in pairs, travel between connected worm holes takes
1 tick. - Pulsars - Pulsars are always visible to all players in the game.
Special Star Monthly Bans
In official games, 2 special stars are banned from the pool, this resets on the 1st of every month. Check the game settings before joining an official game to see which special stars are banned and adapt your strategy and tactical play to gain an edge.
Infrastructure
There are 3 types of infrastructure that can be built at stars:
- Economy - Increases income at production, each point of Economy earns 10 credits on the production tick.
- Industry - Increases ship production rate.
- Science - Increases research speed. Each point of Science will generate one research point per tick for the chosen current technology that is being researched.

When you select a star its Hyperspace Range and Scanning Range will become visible. Hyperspace Range is displayed as a ridged ring centered on the star and the Scanning Range is displayed as a solid circle around the star.
Resources
A star’s natural resources determines how many credits it will cost to build infrastructure. The higher the natural resources, the cheaper it costs to upgrade. Stars with natural resources tend to be highly saught after.
The Terraforming technology improves the star’s natural resources and makes building infrastructure cheaper.
- Upgrade star infrastructure improve the star’s cash yield, increase ship production and speed up research.
- Build a Carrier to transport ships through hyperspace.
- Build a Warp Gate to accelerate carrier movement.
- Upgrade the Star by hiring a Specialist which grants special abilities.
Split resources
Split resources is a game setting that means natural resources are split into three different values, each one affecting one type of infrastructure. Therefore, stars with e.g. high economy NR, but low industry NR can exist.
Special star types get specific bonuses that affect their NR:
- Asteroid fields have a higher economy NR
- Binary stars have a higher industry NR
- Nebula stars have a higher science NR
Interaction with war machines:
If a war machine specialist is applied to a star in a split resource game, it reduces the resources proportionally. The life duration of the war machine will thus be the average of the three NR values.
Warp Gates
Warp Gates will improve the speed by times 3 of what Carriers typically travel between star. A warp gate must be built at the departure star and the destination star in order for a Carrier to receive the speed boost. The warp gate speed boost also multiplies by 3 even if the traveling carrier has a speed boost from a specialist. Therefore, if the carrier has a times 2 speed boost from a specialist, then when that carrier is traveling between two warp gates it will travel at times 6 speed.
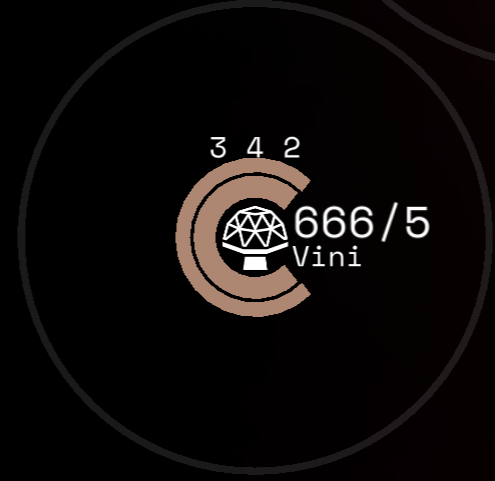
Star Indicators
When zoomed in, you will be able to see the star’s indicator which gives an at-a-glance information about the star. For example an 125/3 indicator displays that the star has 125 ships in total, with 3 carriers in orbit. The full format is as follows:
<total garrison>/<carrier count>*+
*- Indicates that the star garrison may not be accurate, the star or a carrier in orbit has been scrambled. (See Scrambler specialist).+- Indicates that the star has more than 1 player in orbit.
Abandoning Stars
You may choose to abandon a star, in which case all Carriers and Ships at the star will be destroyed and all infrastructure will remain intact, including a warp gate if present.
When abandoned the warp gate will become inactive until the star is claimed again, so it will not grant a speed boost to incoming Carriers.
If an ally is in orbit when you abandon a star, that player will capture the star on the next tick. If there are more than 1 ally, then the player with the highest number of ships in a single carrier will capture the abandoned star.